Introduction (Windows 10 Tutorial)
In this Windows
10 tutorial series, we have made it easy for new users to learn in a very easy way
by reading our Windows tutorial series step by step and watching videos from
our YouTube channel at home online through the internet.
Windows 10 Complete Course (100% Free)
Explore to All Windows 10 Lessons:
Next Lesson
Getting started with Windows 10
Getting started with Windows 10 can be a little intimidating
for those who are new to the operating system, but with a little guidance, it
can be a breeze. In this article, we’ll go over the basics of Windows 10 and help
you get started with using your new operating system.
- Understanding the Start Menu: The
Start Menu is the central hub for accessing all your apps, files, and settings.
It’s the first thing you’ll see when you log in to Windows 10, and it’s where
you’ll spend most of your time. - Customizing the Start Menu: You
can customize the Start Menu to suit your needs by adding or removing tiles,
resizing the Start Menu, and more. To customize the Start Menu, right-click on
the Start button and select “Start menu settings.” - Installing Apps: Windows 10 comes
with a variety of built-in apps, but you can also download and install
additional apps from the Microsoft Store. To access the Microsoft Store, click
on the Start button, then select “Microsoft Store.” - Managing Files and Folders:
Windows 10 includes a built-in file explorer that allows you to manage your
files and folders. To access the file explorer, click on the Start button, then
select “File Explorer.” - Personalizing Your PC: Windows 10
allows you to personalize your PC by changing the background, color scheme, and
lock screen. To personalize you’re PC, right-click on the desktop and select
“Personalize.” - Using Cortana: Cortana is a
virtual assistant that can help you with a variety of tasks, such as setting
reminders, finding files, and more. To use Cortana, click on the Start button,
then type “Cortana” into the search bar. - Setting up OneDrive: OneDrive is a
cloud-based storage service that allows you to store your files and access them
from anywhere. To set up OneDrive, click on the Start button, then select
“OneDrive.” - Keeping Your PC Secure: Windows 10
includes a variety of security features to help keep your PC and data secure.
To access these features, click on the Start button, then select
“Settings,” then “Update & Security.” - Troubleshooting: If you encounter
any issues with Windows 10, there are a variety of troubleshooting tools
available to help you resolve the problem. To access these tools, click on the
Start button, then select “Settings,” then “Update &
Security,” then “Troubleshoot.”
In this post, we
are going to start with Windows 10. We will tell you how to use Windows 10.
Let’s get started. First of all, you are using a computer whether your computer
is old or new. Also, let us tell you which computer to run Windows on the
computer. And what should be its System Requirements?
Installation of Windows 10
Windows 10 is the latest operating system from Microsoft and
is designed to work on a variety of devices, including desktops, laptops,
tablets, and smartphones. Installing Windows 10 on a device is a simple process
that can be completed in a few easy steps.
System Requirements for Windows 10
Processor: 1.8 GHz or faster
RAM: 1 GB 32-bit / 2 GB 64-bit
HDD: 16 GB 32-bit / 20 GB 64-bit
Screen Resolution: 800 x 600
Network: Broadband Internet Connection
Version of Windows
Windows 3.0
Windows 95
Windows 97
Windows 98
Windows Me
Windows 2000
Windows XP
Windows 7
Windows 8
Windows 10
Windows 11 (The latest Operating System)
Before you begin the installation process, it is important
to check if your device meets the minimum system requirements for Windows 10.
These requirements include a 64-bit processor, 4GB of RAM, and 64GB of storage
space. Additionally, you should backup all important data on your device, as
the installation process will erase all data on the device.
Step 1: Obtain a Windows 10 Installation Media
To install Windows 10, you will need a Windows 10
installation media, such as a DVD or a USB drive. You can purchase a Windows 10
installation media from Microsoft or create one using the Media Creation Tool
available on Microsoft’s website.
Step 2: Boot from the Installation Media
Insert the installation media into your device and restart
it. You may need to change your device’s boot order in the BIOS to boot from
the installation media.
Step 3: Begin the Installation Process
Once your device has booted from the installation media, you
will be prompted to select your language and keyboard layout. Then, you will be
taken to the Windows 10 setup screen. On the setup screen, click on the
“Install Now” button to start the installation process.
Step 4: Enter the Product Key
If you have a product key for Windows 10, enter it in the
provided field. If you do not have a product key, you can skip this step and
use Windows 10 in a limited mode.
Step 5: Accept the License Terms
You will need to accept the license terms and conditions to
continue the installation process.
Step 6: Choose the Installation Type
You will be asked to choose the installation type. You can
either upgrade your current operating system to Windows 10 or perform a clean
installation, which will erase all data on the device.
Step 7: Customize Settings
You will have the opportunity to customize various settings,
such as the color scheme and privacy settings.
Step 8: Wait for the Installation to Complete
The installation process may take a while to complete,
depending on the speed of your device. Once the installation is complete, you
will be prompted to create a user account and set up Windows 10.
In conclusion, the installation of Windows 10 is a
straightforward process that can be completed in a few easy steps. By following
the steps outlined above, you can have Windows 10 up and running on your device
in no time.
Here we tell you about Windows 10 and how you can start it and work on it? A computer needs an operating system to work. If the operating system is not installed on the computer, then you cannot work on the computer. Basically, the Windows operating system establishes a relationship between the user and the computer. When you start the computer the operating system is ready for you to work on the computer. You can fully operate the system with software, and connect to hardware devices, and internet, etc. Let’s go to start windows 10.
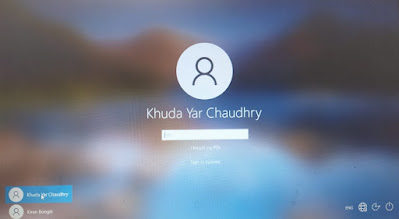
Signing in to Windows
10 with Microsoft Account / Local User
When you
start Windows 10, you will be asked to create a Microsoft account. If you have
a Microsoft account, enter your Microsoft account Email / ID and type your
password, and press Enter key. As you can see in the picture below:
For more information about Microsoft Accounts, you can
review our post on “How to Create a Microsoft Account?”
If you created a local user account in Windows 10, you select the local user account and type your
password and press Enter key. As you can see in the picture below:
review our post on “How to Create Local User Account or Administrator Account in Windows 10?”
Desktop Windows 10
When you
enter the username and password, there is a desktop shown in front of you. The
desktop is your main place where you can manage your files and folders, open
your programs / Applications, and access the Internet. Here! You can do much
more.
There is a proper way to shut down the computer,
but here many users make a mistake and turn off the computer with the power
button. It uses the wrong method. The computer shuts down properly. Now we will
teach you how to shut down the computer. Consider the options below.
1. Click on Start Button
2. Click Power on the left side (see in below
picture)
3. Then click Shutdown. Your computer will be shut down.
For more information about creating the shutdown button in the start menu; you can review our post on “How to Create Shutdown Button in Start Menu/Taskbar for Windows 10?”
We hope you enjoyed our first Windows 10 lesson.
Thanks for reading our first lesson. Click here for the next lesson “Main Features and Interface of Windows 10”.
Windows 10 Complete Course (100% Free)
Explore to All Windows 10 Lessons:


